
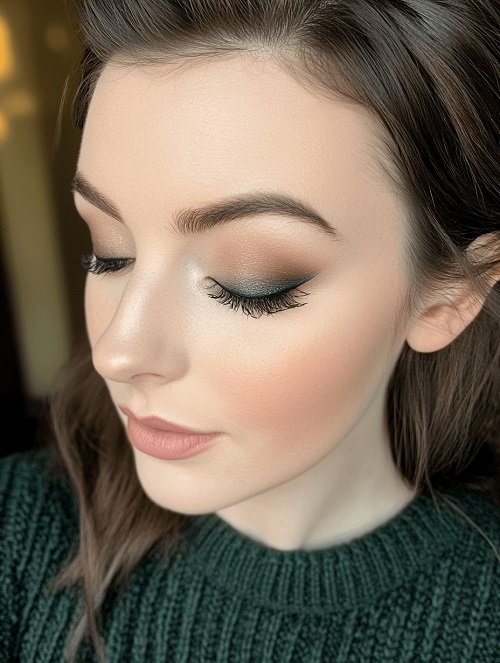
Master the smoky eye makeup with this simple step-by-step tutorial. Perfect for beginners who want bold, beautiful, and easy-to-do eye makeup!
Smoky eye makeup looks never go out of style and never will. In fact, they’re bold, sultry, and always trending in style. In this tutorial, we’ll show you how to create the look in just a few easy steps.
Why Everyone Loves a Smoky Eye Makeup?
A smoky eye makeup look is one of the most loved makeup looks because it goes with almost every outfit and occasion. The best part is that it goes with a wedding event, a night out with friends, and even if you just want to do something extra on a normal day!
Another reason for its popularity is that it is customizable. You don’t always have to stick to deep black or soft browns, greys, or bronzes. Even colorful shades like navy, green, or plum can give you a fresh twist.
No wonder it’s a universal favorite across all age groups and styles!
Smoky Eye Makeup Tutorial: Step-by-Step Guide
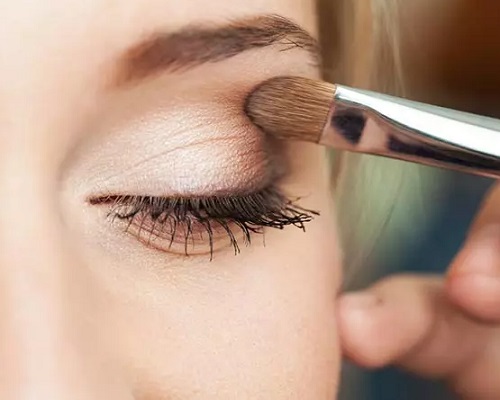
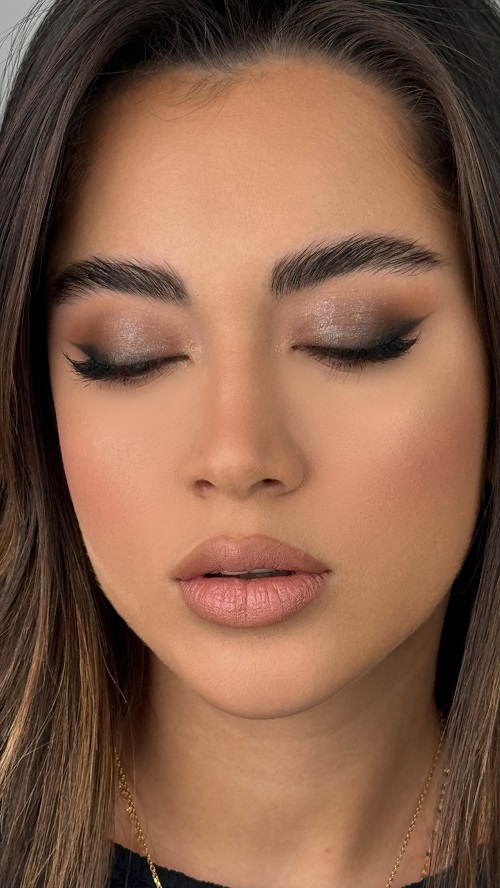
1. Prep the Base
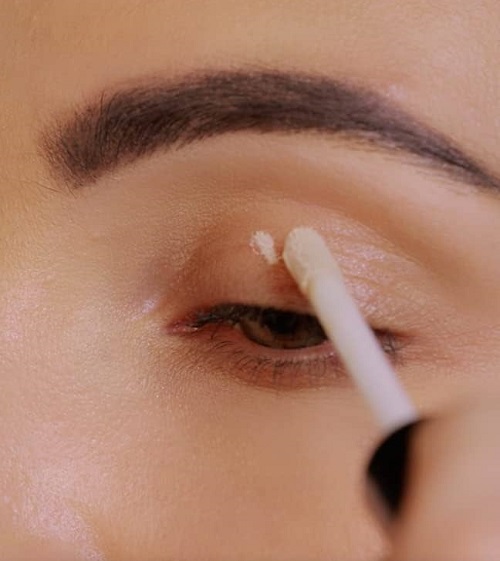
Let’s start fresh with a clean eyelid and apply a thin layer of eye primer or concealer. This helps to create a smooth surface for your eyeshadow and prevents it from creasing. If you don’t have a primer, even a little dab of foundation with setting powder can do the trick!
2. Apply the Transition Shade
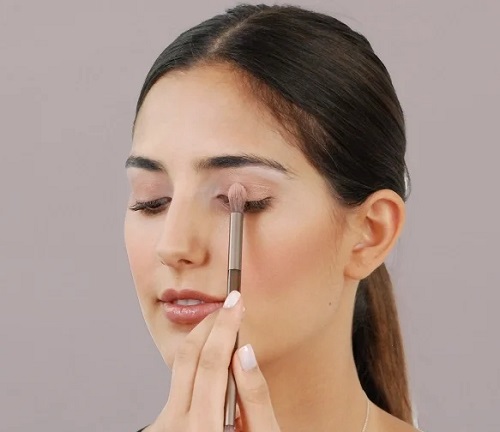
Then take a fluffy blending brush and sweep a light brown or nude shade across your crease (the fold of your eyelid). This shade acts as a “transition” between your skin tone and the darker colors you’ll be applying later.
3. Add Depth with a Medium Shade
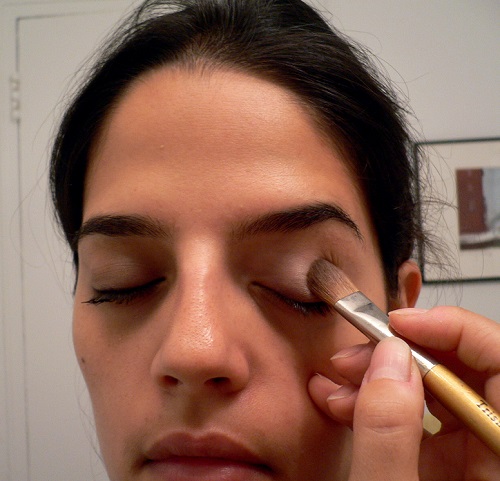
Now, pick a medium-toned color like taupe, grey, or bronze and apply it just above the crease and onto the outer half of your eyelid. This step builds depth and gives your eyes that smooth gradient effect that smoky looks are known for.
Pro Tip: Keep blending in small circular motions to soften the edges.
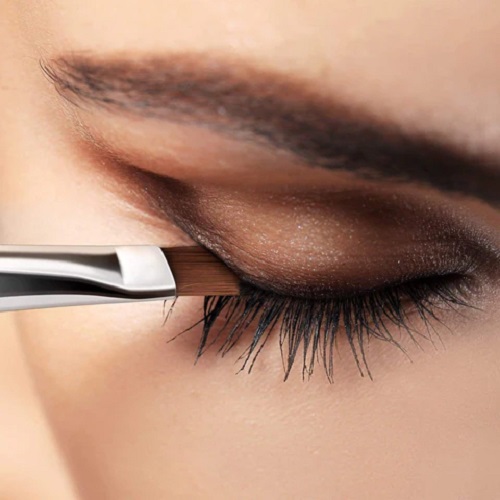
4. Pack the Dark Shade
Here’s where the drama begins! Choose your darkest shade (usually black, charcoal, or deep brown) and press it onto the outer corner of your eyelid with a flat brush. Slowly bring it towards the center of the lid, keeping the inner corner lighter for balance.
Blend carefully so the edges melt into the medium shade—you want a seamless fade, not blocks of color!
5. Line and Smudge
Time to define those eyes. Apply eyeliner close to your upper lash line (and your lower one too if you’re in the mood for drama). But instead of keeping the line sharp, smudge it out with a brush or cotton swab.
This soft blur is what gives the smoky eye its signature sultry vibe!
6. Highlight the Inner Corner
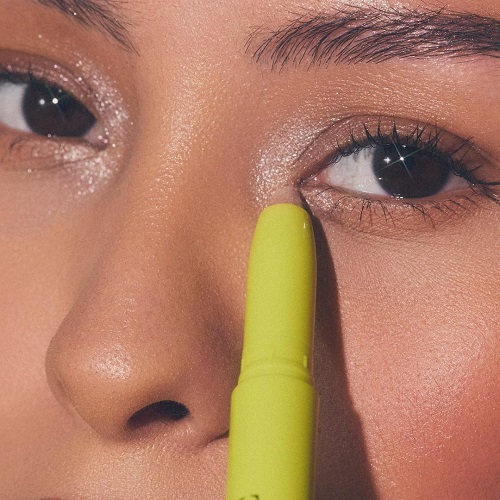
Don’t forget this little step because this is what makes a huge difference! Dab a shimmery light shade (like champagne, pearl, or silver) onto the inner corners of your eyes. It instantly brightens your look, adds sparkle, and keeps your eyes from looking too heavy.
7. Finish with Mascara
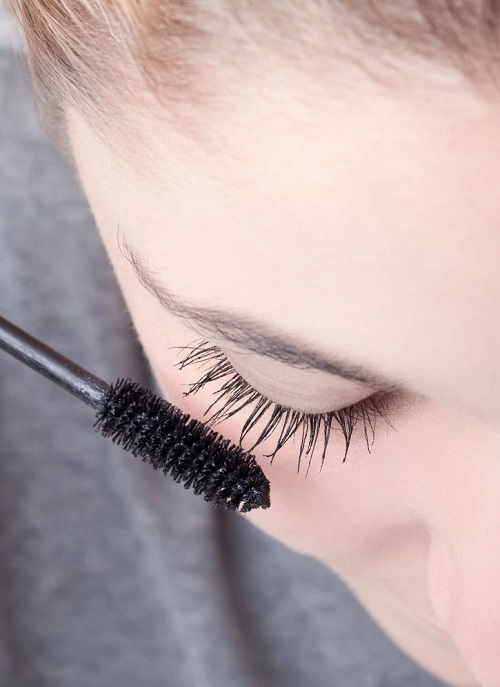
No smoky eye is complete without lashes. Swipe on a few coats of volumizing mascara, wiggling the wand from root to tip for maximum lift.
Or else do you want to go full-on glam? Pop on a pair of false lashes and watch your smoky eye transform into a red-carpet-ready look!
Pro Tip: Always keep a clean blending brush handy to soften edges as you go. A well-blended smoky eye looks polished, while harsh lines can make it appear messy.
Tips and Tricks for the Perfect Smoky Eye
The secret to a flawless smoky eye is blending. Always blend your shades in small, gentle motions to avoid harsh lines. This is what will give a smooth look. Then, start with less product on your brush because it is always easier to add more color than to fix an overly dark eye.
Then you can try to pair bold smoky eyes with a neutral lip color to keep your makeup balanced. If you’re going for soft brown smoky eyes, you can experiment with bolder lip shades and so on. Don’t be afraid to try color variations!
Keep a makeup remover or cotton swab handy to clean up fallout or sharpen the edges to give a clean and polished look! So, let us know how it goes.